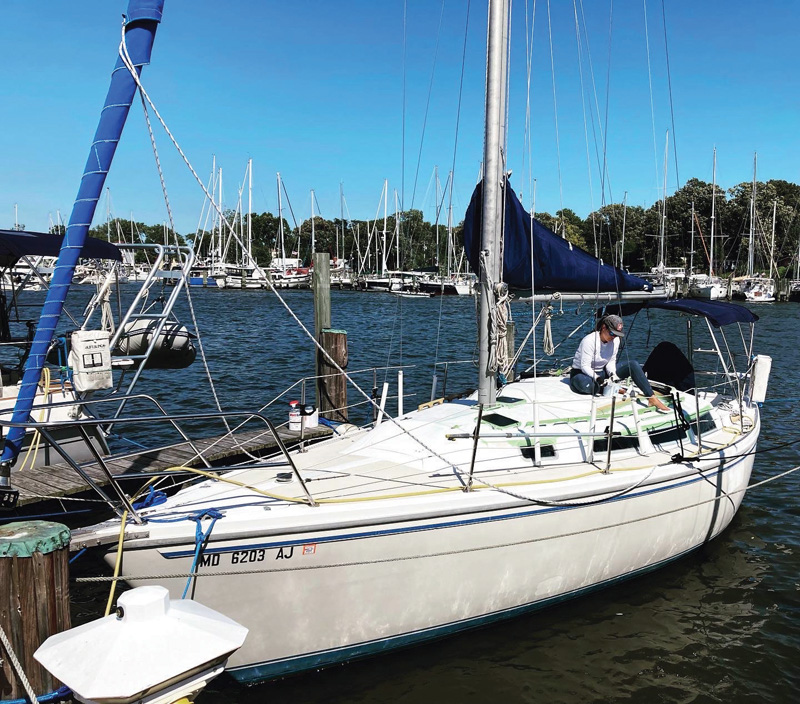
This Catalina 30 had just the right amount of refit projects
After only two weeks since deciding that I was ready to start searching for my first sailboat, I came across an ad on Craigslist for a 1983 Catalina 30 that perfectly aligned with my desires. After a thorough inspection, I concluded that she had just the right amount of refit projects that were within my budget, expertise, and resources.

Starting out with something that seemed manageable, my first project on Moondust was installing a new shore power inlet. If I had had the right tools when it came to wiring, all would have gone smoothly, but such is the dilemma of a new technician/boat owner building their toolkit. I called in backup from my mentor at Diversified Marine Services (DMS), Colleen Moore. With her tools and supervision, the inlet was successfully installed with a new shore power cord.
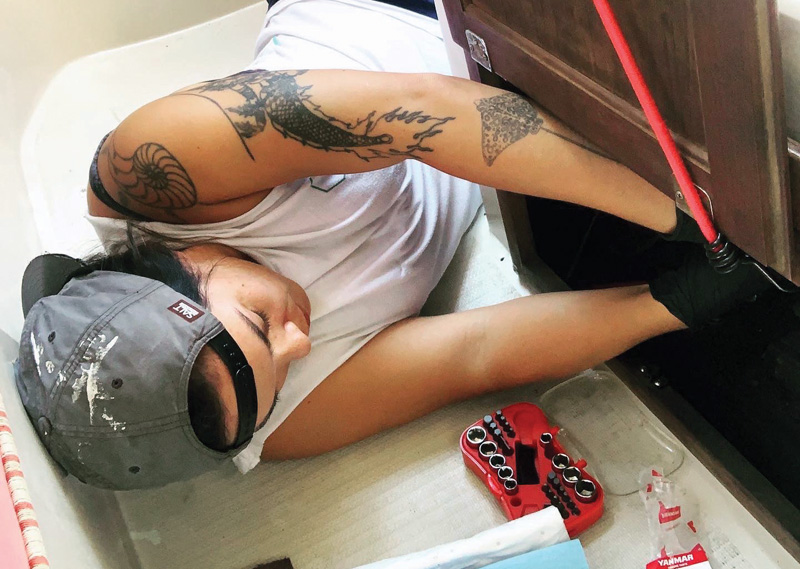
Moving down the list of priorities, I had an oil and fuel leak on my engine, which I first tried to remedy by changing the gasket and crush washers, but it still leaked. Eventually I replaced it with a new fuel lift pump. After I had all parts in place and supposedly had done everything right, it still leaked!

Though some projects require special tools, I was able to change out my fuel lift pump with this handy gear wrench kit.
I had overlooked the fact that one of the fuel injectors had a small burr that was causing the leakage. By taking some sandpaper to the face of the injector, I was able to create the flush seal required to fix the leaks.
On the topic of unwanted fluids, I successfully installed a new check valve to prevent the backflow from emptying back into the bilge, which definitely helped bolster my confidence when I ran the bilge pump and there wasn’t any backflow.
On to restoration projects
Then, it was on to restoration projects, such as cleaning the teak handrails and companionway panels. Cleaning the teak with Te-Ka yielded a massive transformation, and applying four coats of Semco wood stain was the satisfying cherry on top.
When the spring showers finally started to cease and the warmer temperatures rolled in, I embarked on the largest project: repainting the top decks. My restoration mentor at DMS, Matt Jones, guided me through what the entire process would entail and cost. Although it was going to be an involved process, I was poised and ready to give my sweet sailboat a solid refresh.

I was going to be using a roller and brush, compared to the spray gun technique, which meant I would be using a technique called rolling and tipping. You first roll the paint on with a foam roller and use the brush to barely swipe across the surface so that you can pop any bubbles left on the surface. My sailboat would remain in the water, which is certainly not the easiest approach when painting a boat.
The first step was to scrub away the oxidized gelcoat, otherwise the paint would not adhere well. I thoroughly scrubbed her three times over until the oxidized gel coat remnants were gone. In addition, I had to sand down an irregularity in the cockpit where the previous owner had repaired the binnacle and clean up rogue butyl tape that had been applied in a smattering of locations.
Next was masking off all the hardware and teak so that I could begin priming. What many don’t realize is that it is the preparation of the area that takes the longest. Since I was a one-woman show, I divided up the deck into sections so that I wouldn’t waste any materials by making more than I could feasibly apply in one session.
Applying the primer was incredibly satisfying but also seemingly endless since I had to get every inch of deck covered with multiple coats.
I quickly learned about the delicate timing when working with primer, as my attempts to go back over sections that had just begun to cure led to the swift destruction of my foam rollers. I also can testify that it is worth affording the higher quality green painter’s tape. During one of my supply runs, the lower quality green tape was the only type available. While I thought it wouldn’t make much of a difference, it barely adhered during application and was even more of a nightmare to remove.
After a few coats of primer, it was time for sanding. I thankfully had support from a friend, meaning that one of us used the orbital hand sander and the other used a piece of sandpaper by hand to get every curve and face sanded.
Though I had made it past the spring showers, now I was faced with navigating the afternoon thunderstorms of summer. Paying close attention to the forecast, I entered the home stretch of this project. I used AWLGRIP ‘Off-White’ for the smooth areas and ‘Moondust’ for the non-skid areas.
Once the multiple coats of ‘Off-white’ were complete, I excitedly tackled the final rounds of painting the non-skid areas. This was the most satisfying part of the entire painting project because each section I completed brought the new image of my sailboat closer and closer into view. They were also the sections with the smallest surface area and the most straightforward to paint.
A tip that saved me a lot of grief when it came to rogue paint strokes was having acetone and a rag on hand to easily wipe them away before they dried.
After painting myself off the boat three times, endless trips to West Marine, and three months of long hours in the sun, my sailboat beamed with her new fresh coat of paint! It was the cherry on top of the fact that the engine purred like a tiger and all her systems were in great working order!
Though I was armed with the ‘professional’ protocol of how to execute these projects, the most growth occurred through the errors and mistakes I made. My endeavor into this refit was the hands-on approach that I was looking for. While I was able to practice what I had learned from my apprenticeship, I also learned how to be an effective boat owner, project manager, and overall better solo sailor.
by Chelsea Co
About the Author: Chelsea Co (@deepbluechelsea) loves to share stories about momentous mariners and savvy sailing. From working as delivery crew to owning and refitting her own boat, Chelsea soaks up as much knowledge as she can to prepare for her circumnavigation.


