Spring DIY for Sailors: Servicing Your Sailboat’s Winches
The inner workings of winches can easily slip our minds, given the multitude of other sailing maintenance items that demand a sailor’s attention. But winches are integral to the safe operation of any sailboat, and while it doesn’t happen often, winch failure is a recipe for disaster. Winches should be serviced annually to maintain performance and safety. What’s one more thing to add to your list, really? Opening up a winch can be daunting, but following these steps will ensure that you don’t lose any parts or put grease where it doesn’t belong.
 What You’ll Need
- A bowl or cloth for organizing parts, perhaps several.
- Screwdrivers. Check the screws on the top of your winch for guidance on what type you’ll need.
- A small scrub brush. If your winch has frozen up or it has been a while since the last service, you may need a wire brush. If you’re just doing an annual checkup, you may only need a toothbrush or something similar.
- A small (one inch or less) epoxy or paint brush for grease.
- Winch grease.
- Winch/pawl oil.
- Clean rags.
- Acetone or another solvent (mineral spirits, bike degreaser, etc).
- Gloves.
- Spare pawls and pawl springs, especially if you suspect an issue or it’s been a while since the last service.

Disassembling Your Winch
These steps should be applicable to most common winches. However, it may still be helpful to reference a diagram of your specific winch. Before you start removing parts, make a plan for organization. I recommend taking pictures of your winch at each stage of the disassembly process and laying out your parts in rows.
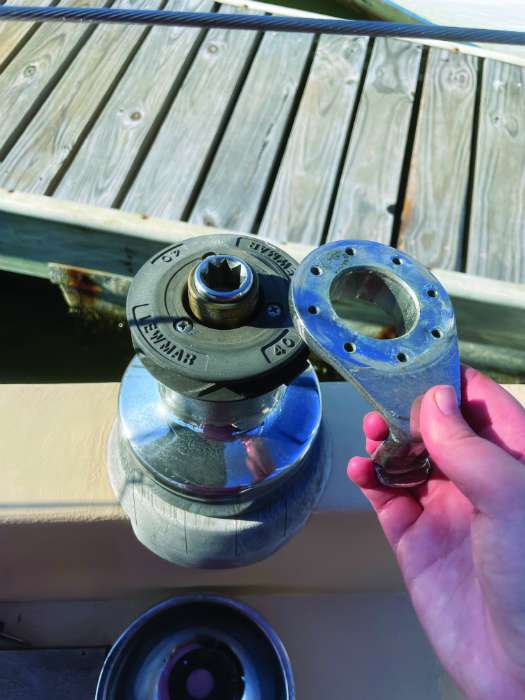
Every winch will have some type of top plate that holds the self-tailer on, and it is likely attached with several screws. There may also be an O-ring or a pair of collets (small C-shaped metal pieces) underneath the top plate that prevents the self-tailer from spinning with the winch. Remove the screws, top plate, self-tailer, and any other hardware involved in these parts and set them aside. If you have a non-self-tailing winch, it may just have a metal ring that should be removed using a fingernail or flathead.
Now you should be able to slide the main drum off. Grip the drum where the line usually wraps it, and gently pull straight upward. If you’re doing this aboard, take extra care that any bearings that may come off with the drum don’t fall out and roll overboard.
If you have a larger winch, there may be an inner drum assembly. It should have screws at the bottom that secure it to the base of the winch. If so, remove these screws, and slide the inner drum off the same way as the outer drum.
Now you should be able to see gears near the bottom of the winch and bearings stacked on the main stem. Remove the bearings by sliding them up and off.
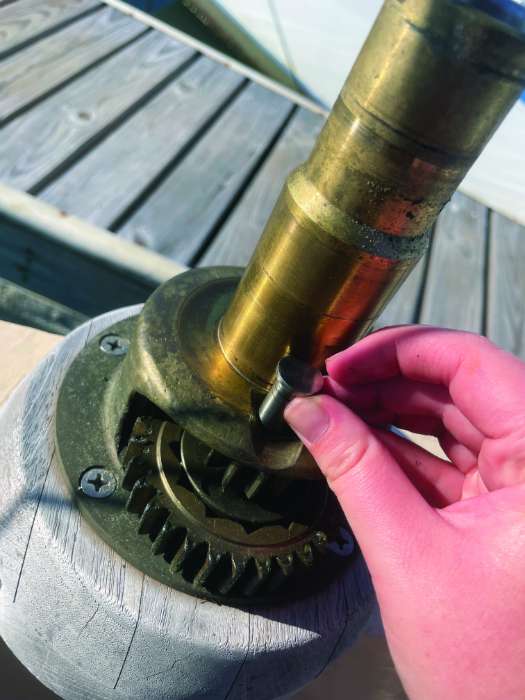
Next, remove the gears and the main center stem (the piece that the winch handle fits into from the top). This will be a slightly different process depending on the winch. My winches have a pair of oversized cotter pins that drop down vertically to keep the two sets of gears in place, so all I have to do is lift those pins out before I can slide the gears out horizontally. If it is not immediately evident how to remove yours, consult a diagram of your specific winch for some insight.
Lastly, take apart the gears themselves. They should be in stacks, with one of the gears in each stack having pawls and springs inside. To separate the gears, simply pull them apart. Remove the pawls and springs very carefully—the springs, especially, like to jump out of your hand and disappear.
Servicing & Reassembling Your Winch
The most time-consuming aspect of winch service is cleaning. If your winches are relatively new or serviced regularly, this part may be easy. If your winches are older, rarely serviced, or frozen up, this part could take an hour or more.
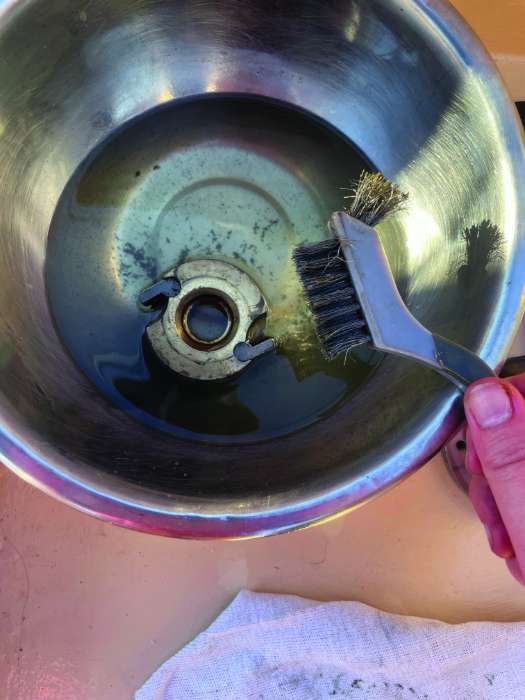
Break out your gloves. Clean each part that has grease, oil, or salt buildup using your wire brush/toothbrush and solvent. This includes anything with teeth—the inside of the drum, the main stem, and the gears—as well as pawls, springs, and bearings. Some parts, such as the bearings, may only need a rinse in your solvent and a rub down with a clean rag. Others, such as the gears, may need dedicated time with the brush to get all of the gunk out from tight spaces.
As you clean, inspect each piece. Bearings should be free of cracks, and each rod should spin freely. All the teeth on the gears, drum, and the main stem that the winch handle locks into should be sharp and not worn down. If any of your pawls look dull and rounded, replace them. Your springs should also still be “spring-y.” Many sailors choose to replace all of their pawls and springs each time they service their winches, just to be safe.
After you have removed all of the old grease, oil, and salt buildup from each part, wipe everything down with a clean rag.
Before I break out the grease, I like to do a bit of reassembly first. I place the pawls and springs back into their gears, put the gears back together (this is easier if you squeeze the pawls into a closed position first), and secure them back into the winch before any grease becomes involved. Put a little bit of winch/pawl oil on your pawls before they become inaccessible again. Do not put grease on your pawls.
Now it’s time for the grease. Use your epoxy brush to spread grease onto all of the teeth on the gears, the inside of the drum, and the main stem. Make sure you get all the way into the crevices between the teeth. There should be an even coat that is not too thick nor too thin—the exact amount is perfected over time, but if in doubt, add a little bit more.
Now you can work backwards to reassemble the rest of the winch. Put the main stem that the winch handle locks into back into the center, oil or lightly grease your bearings (all-metal bearings can be greased, plastic ones should be oiled), and slide them back on, slide the inner drum assembly back on and screw it down if you have one, slide the main outer drum back on, reassemble the self-tailer and top plate in the backwards order from how you removed them, and screw the top plate back down.
Give your winch a spin. It should spin more freely, and the clicking of the pawls may be crisper and clearer.
If you’re having trouble figuring out how exactly to disassemble your winch, whether or not a part should be replaced, or the best grease or oil to use, reach out to your winch’s manufacturer or check its website. Many manufacturers have their own guides on how best to maintain their winches. Happy trimming!
By Kelsey Bonham
Find more sailboat how-to articles here.


